Showing posts with label house renovations. Show all posts

Wednesday, March 15, 2017

DIY Rope Porch Swing

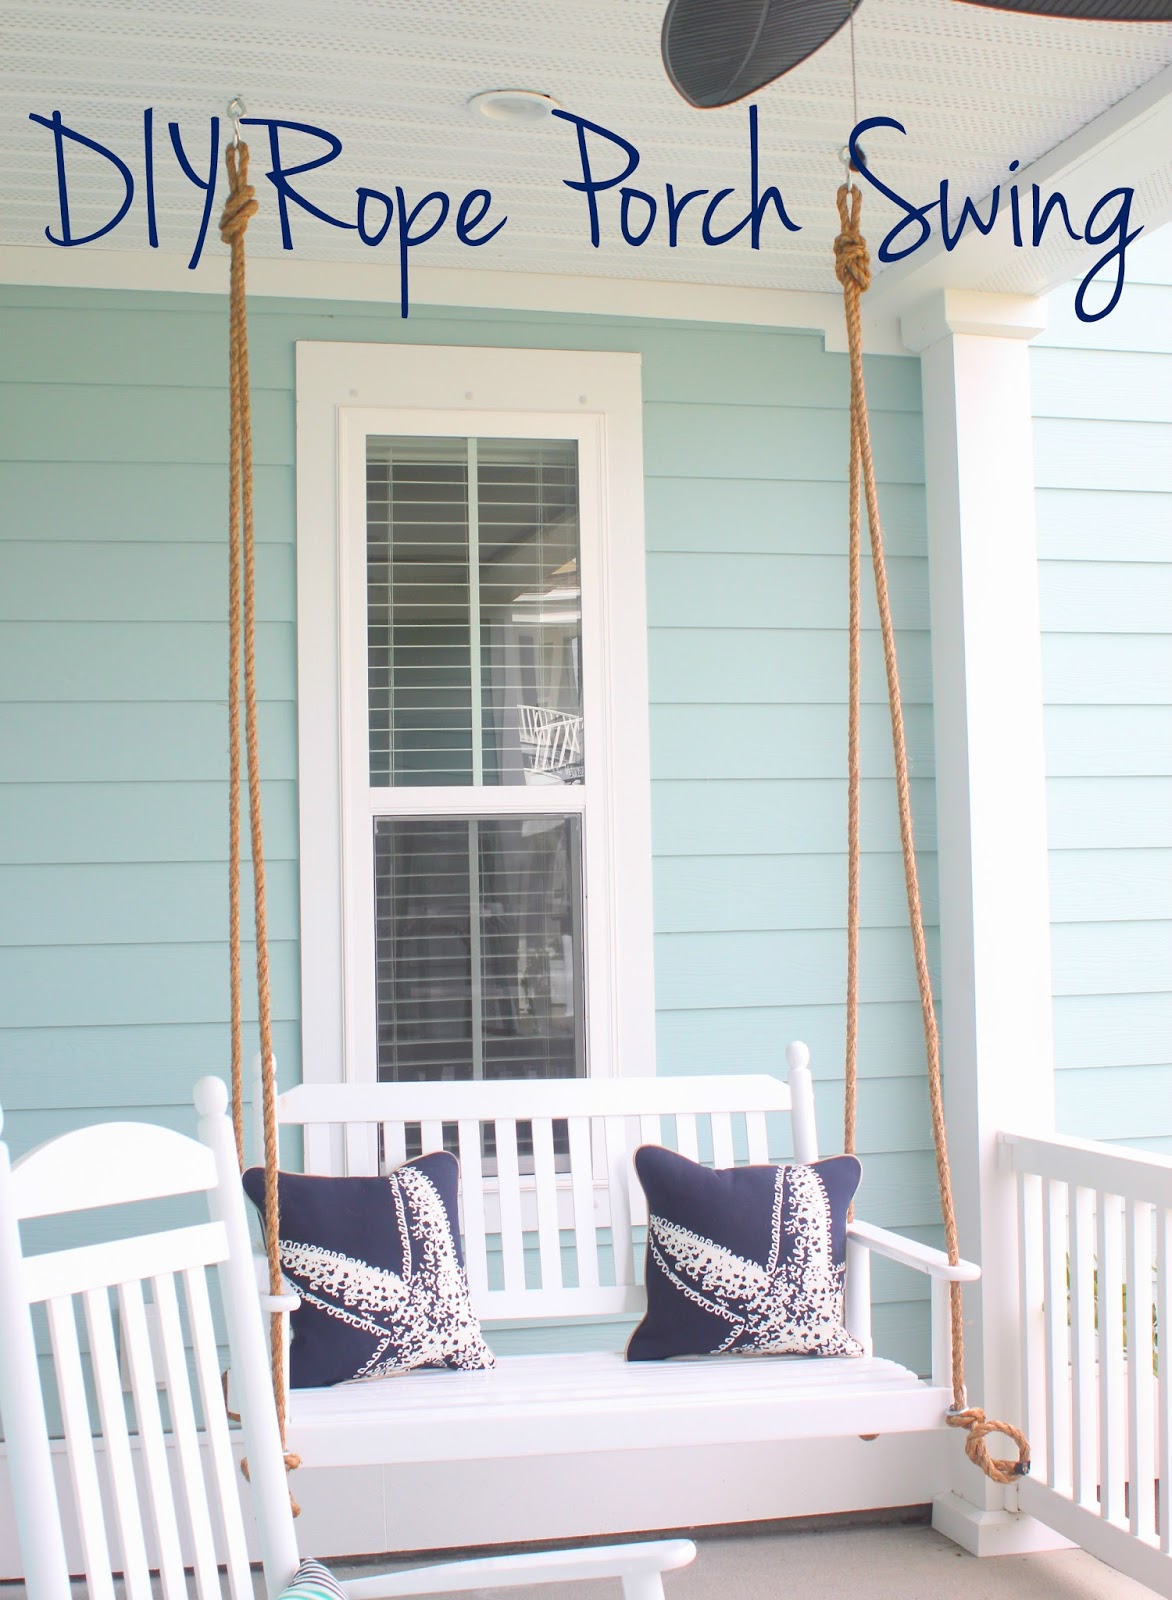
Late last fall, Mike completed one of my favorite house projects to date, my rope swing.  I've been dreaming of one of these since I saw Chassity's on Look Linger Love when I first started following her when I moved to Charleston.  I love the idea of a dreamy outdoor space.  I still need a few more pillows to get to the LLL comfort level, but I am thrilled with the way ours turned out.
We started with this classic porch swing.  It wasn't very hard to put together with all of the wooden pieces and bolts included, but what I didn't like was the metal chain.  We bought this swing with every intention of transitioning it to the rope swing, so we just made sure that we chose one that could fit the diameter of the rope we needed.*
To convert your own swing to a rope chain, you will need the following equipment:
- 3/4 inch diameter twisted sisal or natural manila rope (length: ground to ceiling height x 4)
- electric tape
- 2 eye lag bolts (rated for at least two people's weight*)
- 2 s-hooks

And these tools:
- Dremel
- knife to cut rope
- tape measure
- cordless drill
- stepped unibit
- proper drill bit to pre-drill lag bolt
- bar of soap
- any screwdriver
1. Start by using the Dremel to cut the chain that came with the swing.  Make sure you only cut the chain, not any other hardware connected to the swing.  
2. Cut the rope in two even pieces and wrap the ends in electrical tape so it won't fray.  At a later time, we plan to whip the rope with twine to make it look a little nicer.
3. Measure the width and depth of the swing from hanging point to hanging point.  You will make two holes in the ceiling, as wide as the swing's hanging points and equally in the middle of the swing's depth.
4. When you've chosen your hanging spots, use a drill with a stepped unibit to cut through the vinyl ceiling-liner.  This hole should be just wider than the shank of the lag bolt.
5. Pre-drill a hole into the ceiling/floor joists overhead.  This hole size is dictated by the size of the lag bolt you choose and should be listed on the bolts.*
6. Coat the lag bolt threads with bar soap to reduce friction and heat before screwing them into joists.
7. Screw the lag bolts all the way in by hand, very slowly.  Mike used a screwdriver for leverage to turn the bolt 180 degrees every 30 seconds or so.  Generating too much heart can weaken and break the bolts during installation.
8. Tie an overhand knot on a bight in the middle of each of the two pieces of rope.
9. Hang each knot from the lag bolts, using an s-hook.  To make each knot snug (and as a sanity-check to make sure bolts were secure), Mike swung from each side before proceeding.
10. Now it's time to hang the swing!  Prop it evenly on a chair or table that's approximately at the right height.
11. Run the rope through the holes in all four corners and tie into knots.
12. Finally, release the swing, and go around, adjusting the knots to get the final swing perfectly even.

There you have it!
For the porch details, you can find the matching rocker here, and I am so excited that those outdoor starfish pillows and the round end table are back in stock at Target.  You can also find similar lumbar pillows here and here.  
Obviously, everyone (including Shadow) loves our outdoor spot as the weather is getting warmer!

*Borrowed Heaven makes no representations or assertions on what the proper weight rating is for your individual application.  If you need guidance, please consult your local hardware store.

Monday, June 16, 2014

You're Gonna Miss This...

Part 2

Yeah, I am going to miss this place like crazy.  We've done so much here together, and we've really made it our home.  We decided to just rent it for a couple of years and take it one day at a time, thinking that we might come back after living in the South for a while.  To be honest, we're just not ready to let go yet.  Luckily, we have a fantastic real estate agent and Mike's family and friends are close by, so they will keep tabs on it for us.


No, I'm not going to miss her... don't worry, she and the other kitty princess are coming with us!  I just know she will miss her roof!


T-minus 9 days! Part 1 if you missed it...

Tuesday, January 14, 2014

I Love Painting: Tuesday Tutorials

I really love painting.  No, unfortunately, not painting on a canvas or creating art, I'm talking about painting walls.  I'm not quite sure why I love it so much, maybe it's some genetically passed down passion.  My grandfather was the head of the painter's union at Electric Boat and really loved his job.  My dad learned how to paint from him and is REALLY good at it, as well.  I like to think that I'm good at it, but maybe I'm just the only one who enjoys it and that's why Mike keeps giving me the job of painting.  Nonetheless, I've had a hand in painting every single one of the rooms in our house [even when I wasn't living there].  
I just love it!  I love choosing the colors and the feeling of accomplishment when you get to pull the tape off the windows and the baseboards when you're done.  Now you think I'm a geek...
If you're still with me, here are my tips for painting the cleanest and most appealing rooms:

1. Choosing your colors: You know how much I LOVE paint chips, but let's be honest, colors don't always turn out like they look in those chips.  It's important to buy sample paint [it only costs a few dollars] and paint it on multiple walls of the room.  The amount of light, shadows, and other furniture can make paint look completely different from room to room.
 
2. Choosing your type of paint: Now that you have your colors, you need to choose your type of paint.  You have two choices to make:  1. whether or not to do paint and primer in one and 2. paint finish.  

        1. This is a decision of whether or not you want to use primer.  You usually need two coats of either type of paint, but your choice is whether you want to do a third coat [primer, first], or paint with much thicker paint [with primer in one].  

        2. Paint finish is usually a decision based on the type of room.  You can feel what the different finishes look like at most paint stores.  Here are some pros and cons of each type:

- Flat [no shine]: Pro - great for concealing imperfections; Con - does not clean well; Great for: ceilings, bedrooms, dining rooms, and living rooms
- Eggshell [low sheen]: Pro - easy touchups; Con - mars easily; Great for: bedrooms, dining rooms, and living rooms
- Satin [pearl-like sheen]: Pro - scrub-ability; Con - more difficult to touch up because differences in sheen could be obvious; Great for: children's rooms, family room, kitchens
- Semigloss [fairly shiny]: Pro - Resistant to humidity, stains, chipping, and is easily cleaned' Con - cannot touch up without showing imperfections; Great for: kitchens, laundry rooms, bathrooms
- Gloss [mirror-like finish]: Pro - Easiest to clean; Con - Shows imperfections like a mirror; Great for: molding, trim, and woodwork

3. Start with sanding and sponging the walls: I swear, it takes like 5 minutes but makes everything look so much better.  Get a sanding sponge and extra large sponge.  Start by lightly sanding every wall to remove any impurities and finish by lightly [with VERY little water] sponging each wall to remove any dust.

4. Tape: Frog Tape is a must.  It might be a bit more expensive than other tapes, but the lines it leaves are so straight and perfect without allowing paint to seep under the tape.  Also, when you're done painting, make sure to take the tape off while the paint is still wet.  Yes, you have to be careful and you will get paint on you, but if you wait until it dries, you risk full strips of paint ripping off when the paint dries to the tape.
 

5. Your Painting Tools:  While I'm not a huge fan of rollers [my grandfather would roll over in his grave if he ever knew I ever suggested others use one], but unless you want to take hours and hours to paint, you'll want to get three different painting tools: high quality paint brushes, a roller, and an edger.  

I assume you know how to use the first two, but just in case: make sure you use the brush around the edges, near the tape and corners and use the roller in the big areas.  The edger is something new I learned about while painting with Mike.  Seriously, it's a miracle tool.  All you do is pour a little paint in a shallow tupperware container big enough for the whole edger to sit in.  Then, you make sure the little back button on the back is pulled backwards, dip the edger in the paint, and scrape off the excess with the edge of the tupperware.  Finally, flip the black button forward to create the paint barrier, and roll it along the edge of the ceiling.  It makes a perfect edge, every time!  Just make sure every time you need more paint, you flip the black button back to maintain the paint seal.

Now you are ready to paint!  Have fun and make sure to get tons of paint all over you - just like I tend to do...

Bonus idea: If you're looking to make a room extra fun, think about applying chalkboard paint!  It goes on really easy and we love it in our kitchen.

Wednesday, November 6, 2013

Basement Bathroom DIY Reveal

About a month ago, Mike and I decided we wanted to get going on our LAST house project.  

Side note: seriously, that's so weird to say.  Three and a half years ago, this house was covered in awful wallpaper and outdated everything.  You can check out the old wallpaper and all the other reno projects by clicking here.  

Over a year ago, we finished the main half of the basement with a bar, but we've been putting off the kitchen and bathroom portion like crazy.  Since we don't need a second kitchen, we decided to transform it into a full laundry room as well as update the bathroom.  Mike and I have been working side-by-side, quite literally: his project is the laundry room and mine is the bathroom.  This isn't the first time I've redone a bathroom, it's actually the third one I've done in our house.  Here's our main floor half bath and the vlog I made when I started our upstairs bath [seriously, it's a gem, check it out haha].  Apparently I never showed the final upstairs bath photo since this is the most recent upstairs bath update, so here it is:


Now back to downstairs, a couple of weeks ago, I gave you a sneak peek of the finished product, but now that we've added the final accents, it's time to show you the whole thing!  I'm so sad we don't have any real "before" photos from when our roommate lived down there, it was GROSS!  It took a lot of scrubbing, sanding, mudding, sanding, painting, and patience, but I did it!  
Here's what we started with in the basement [after I smashed a hole in the wall, of course].  The bathroom is behind Mike.  

 
Before painting - I didn't realize that I forgot to take photos before mudding and taping!

 
mid-painting
 

 AND NOW, WELCOME TO OUR NEW BATHROOM!!!


My completed project [on the left] and Mike's current state [on the right] - I WIN!!! ...or I guess he does because now I get to help him.

 
Design Poppiness Designs